Recipients from File
Excel File
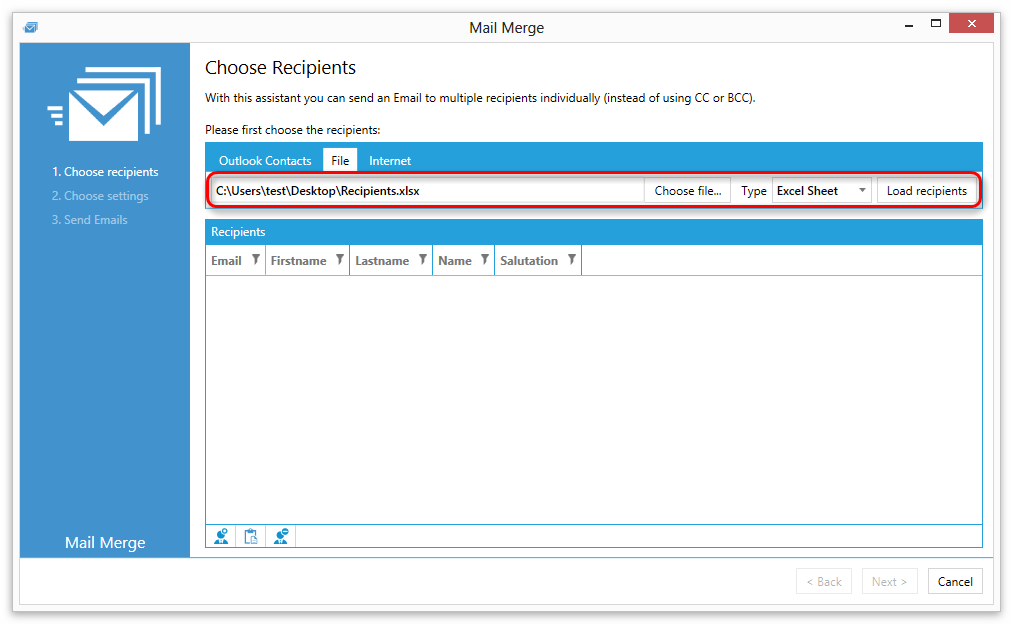
Loading recipients from an excel file
To load recipients from an excel file follow these steps:
- Click on "File".
- Select "Excel Sheet" in the field type.
- Click "Choose file..." and select an excel file.
- Click "Load recipients".
Structure of the Excel File
The Excel file must be structured like the following example:
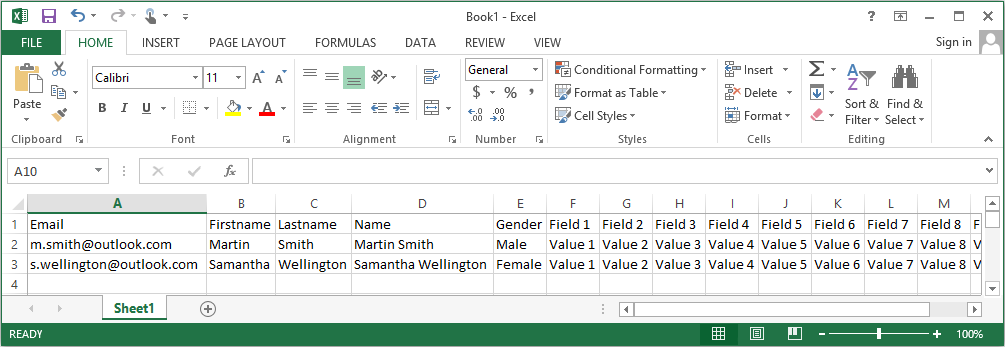
The data must be contained in the first worksheet in the excel workbook.
The columns Firstname, Lastname, Gender and Field 1 to Field 20 are optional.
If you do not provide a gender, then Reply Assistant will detect the gender based on the name.
The column Gender can contain the values "Female" or "Male".
CSV File
Loading recipients from a CSV File
To load recipients from a CSV file follow these steps:
- Click "File".
- Select "CSV File" in the field type.
- Click "Choose file..." and select a CSV file.
- Enter the CSV delimiter in the field "CSV delimiter".
- Click "Load recipients".
Structure of the CSV file
The CSV file must be structured lke the following example:
Email;Firstname;Lastname;Name;Gender;Field 1;Field 2;Field 3;Field 4;Field 5;Field 6;Field 7;Field 8;Field 9;Field 10;Field 11;Field 12;Field 13;Field 14;Field 15;Field 16;Field 17;Field 18;Field 19;Field 20 |
The columns Firstname, Lastname, Gender and Field 1 to Field 20 are optional.
If you do not provide a gender, then Reply Assistant will detect the gender based on the name.
The column Gender can contain the values "Female" or "Male".
XML File
Loading recipients from a XML File
To load recipients from a XML file follow these steps:
- Click "File".
- Select "XML File" in the field type.
- Click "Choose file..." and select a XML file.
- Click "Load recipients".
Structure of the XML File
The XML file must be structured like the following example:
<Recipients> <Recipient> <Email>john.doe@example.com</Email> <Firstname>John</Firstname> <Lastname>Doe</Lastname> <Fullname>John Doe</Fullname> <Gender>Male</Gender> <Field1>Value 1</Field1> <Field2>Value 2</Field2> <Field3>Value 3</Field3> <Field4>Value 4</Field4> <Field5>Value 5</Field5> <Field6>Value 6</Field6> <Field7>Value 7</Field7> <Field8>Value 8</Field8> <Field9>Value 9</Field9> <Field10>Value 10</Field10> <Field11>Value 11</Field11> <Field12>Value 12</Field12> <Field13>Value 13</Field13> <Field14>Value 14</Field14> <Field15>Value 15</Field15> <Field16>Value 16</Field16> <Field17>Value 17</Field17> <Field18>Value 18</Field18> <Field19>Value 19</Field19> <Field20>Value 20</Field20> </Recipient> <Recipient> <Email>susan.doe@example.com</Email> <Firstname>Susan</Firstname> <Lastname>Doe</Lastname> <Fullname>Susan Doe</Fullname> <Gender>Female</Gender> <Field1>Value 1</Field1> <Field2>Value 2</Field2> <Field3>Value 3</Field3> <Field4>Value 4</Field4> <Field5>Value 5</Field5> <Field6>Value 6</Field6> <Field7>Value 7</Field7> <Field8>Value 8</Field8> <Field9>Value 9</Field9> <Field10>Value 10</Field10> <Field11>Value 11</Field11> <Field12>Value 12</Field12> <Field13>Value 13</Field13> <Field14>Value 14</Field14> <Field15>Value 15</Field15> <Field16>Value 16</Field16> <Field17>Value 17</Field17> <Field18>Value 18</Field18> <Field19>Value 19</Field19> <Field20>Value 20</Field20> </Recipient> </Recipients> |
The nodes Firstname, Lastname, Name, Gender and Field1 to Field20 are optional.
The node Gender can contain the values "Male" and "Female".
If you do not provide a gender, then Reply Assistant will detect the gender based on the name.